
Showing posts with label Crafting. Show all posts
Showing posts with label Crafting. Show all posts
Friday, November 12, 2021
"God is my --" banner
I wrote these out on index cards, and colored the gold ones and Mom colored the white. Then we strung them as a banner! =) Fun, easy project!


Saturday, March 21, 2020
Crochet Fun~ round 6 (with a pattern)
 (I edited this post to give you the pattern!)
I invented a blanket pattern after I could not find one I liked....
So far so good~ I had a little trouble counting the chain stitches, so I was off by 2, and had to squeeze them out at the end 😓 (don't like to do that kind of thing). But I like the look so far- it is better with 3 colors, but I got carried away, and forgot the white row, Oops!!😂 So, now the story is that I did it on purpose.
I read about the old fashioned way of writing crochet patterns- a kind of "shorthand" if you will-- I tried it and I like it! SO easy!!!
NOTE: be sure that you like the way it looks when you stop & start a row- there is NO avoiding it later- you like it or not, and it's too late to want to change.
Also, I don't recommend starting or stopping on a Triple stitch.


Monday, January 20, 2020
Mini Pink & Aqua Valentine quilt/table topper
How is it that if you sew something you have scraps, and if you commit to using them up instead of storing them---well, they just multiply! I've used ever so much, but there is always more, LOL!

I was excited to find Amy's easy instructions (HERE) - I do like my little quilt, but I think that hers looks better because her prints were all small. (funny note: all the white fabric came from ONE sleeve of my "Civil War blouse"- the pattern was miss-written, and that was upsetting to me, so I never finished...I was finally able to throw away the pattern, and start using the fabric for something else! How freeing!)
Changes: my quilt measures 20"x20" - it is smaller than Amy's because I used leftover 4" squares from my big quilt project. (after washing it measures 19 & 1/2"x19 & 1/2")
1/4" seam allowances
2" squares, 1&1/2" strips between, 2&1/2" borders


Amy's tutorial can be found here:
https://www.diaryofaquilter.com/2012/02/nine-patch-mini-quilt-tutorial.html

 |
| Back side ~ fabric from Sarah |
Changes: my quilt measures 20"x20" - it is smaller than Amy's because I used leftover 4" squares from my big quilt project. (after washing it measures 19 & 1/2"x19 & 1/2")
1/4" seam allowances
2" squares, 1&1/2" strips between, 2&1/2" borders


Amy's tutorial can be found here:
https://www.diaryofaquilter.com/2012/02/nine-patch-mini-quilt-tutorial.html
Saturday, January 18, 2020
zipper pockets
For the most part I like to sew zipper bags and pockets. I could probably happily make them for all my friends, and they would have too many....but this pink & aqua is mine- I lined it in fleece so it would be a safe way to carry glass remedy bottles or a camera. I love it!!!


AND I made these a few years back for 2 of my young friends:


AND I made these a few years back for 2 of my young friends:


Wednesday, January 01, 2020
New Year Card, 2020


I hope that the receivers liked them!
Friday, December 27, 2019
Red Valentine Mug Rugs #2
I made 1 of Jacquelynne's larger Valentine Mug Rug/mini quilts as a New Year gift for a friend (find HER blog & free pattern HERE)

The fun thing about using 2 rows of blocks, is that after you sew them into blocks of 4, you can rotate them to have a better variety/look...if you remember! =)

I'd never bound odd edges before, and was grateful for her tutorial: Binding Odd Angles Tutorial (HERE) NOTE: I learned I truly do prefer to machine sew my binding on the backside, and hand sew it on the front, instead of the other way around, BECAUSE: you aren't blind, and can make the top fit together and look nice, and you can't do that if you machine sew to the front.

Next time: Sew the binding on the back, so that the front is neater!
~~~~~~~~~~~~~~~~~~~~~~~~~
And I made a fun scrappy smaller Mug Rug:

Wednesday, December 25, 2019
Crochet Fun~ round 7
Little shoes (and bird) for New Baby in the family =)


I realized that these are the only pictures I have of the project. Terrible! I did not even lace the shoes or take another photo before I sent the gifts away to their new home. =( Sigh!
Oh well, you can make your own cute "Crochet Converse Baby Booties" following Stephanie's YouTube(HERE)!
NOTE: watch the part about lacing up the shoe BEFORE you stitch all the top/finishing the edge part....she is not clear if you do not, and then you have to buy laces instead of making them. Hmmm.


I realized that these are the only pictures I have of the project. Terrible! I did not even lace the shoes or take another photo before I sent the gifts away to their new home. =( Sigh!
Oh well, you can make your own cute "Crochet Converse Baby Booties" following Stephanie's YouTube(HERE)!
NOTE: watch the part about lacing up the shoe BEFORE you stitch all the top/finishing the edge part....she is not clear if you do not, and then you have to buy laces instead of making them. Hmmm.
Thursday, December 19, 2019
Pink Valentine Mug Rugs #1
I made 2 of Jacquelynne's Valentine Mug Rugs (find HER blog & free pattern HERE)


NOTES:
~If you cut the binding 2&1/2" it ends up being on the wide side (the blue one on the right) so the next one (green on the left) I cut 2".
~I think that I'd have liked to only have 2 rows of checks instead of 3...next time!
~Also, I cut 12 - 5" strips instead of 6 - 10" (for the checks), because the size & quantity of my scraps.Wednesday, December 11, 2019
Pink & Aqua Valentine quilt
My first large quilt project (Twin size) and my first Disappearing 9 Patch. Very easy, and it looks much harder! You just make a 9 Patch and cut it into 4 blocks, re-arrange them, and sew them back together...or wait and mix them up before you sew them back together! (that's what I'm doing)
I got my inspiration from Mary Grace over at "Hooked on Needles" blog : HERE
(She has Red & White, Red & Aqua and one made of scraps.)
 I cut around 330 - 4" blocks! Should make 35 - 9 patch, and that will give me 35 big blocks. I'm planning 5 blocks X 7 blocks.
 I like to lay out 2 at a time- they feel a bit more random that way.
 Sew them, then cut them, and rearrange them! There are MANY ways to arrange the new blocks.

I got my inspiration from Mary Grace over at "Hooked on Needles" blog : HERE
(She has Red & White, Red & Aqua and one made of scraps.)


 |
| My trial block- I made it for my Aunt, I hope she likes it! |
I'll let you know how it goes!
~ a Kacey Musgraves/ Frozen 2 song for you: "All is Found" ~
Saturday, November 23, 2019
New Blanket for Me...
....made with "ME" fabric, lol!
My Aunt Bess made me a "Teddy Bear blanket" when I was a baby-- during my first years I did not use it, Mom stapled it to the wall above my bed...when I was tall enough I'd stand on my bed and lean my little head on it. The blanket came down, and was my FAVORITE- just the right size to wear as a shawl, or cover chilly legs, wrap a stuffed friend in it...cold on a car trip? no problem!
Well...the blanket wore out years ago...I meant to make a new one years ago, never could decide what to make it out of. I got this Mary Engelbreit fabric on clearance at Hobby Lobby, and the red was given to me by Sarah Helm. In place of batting, I used 2 layers of flannel.
(in my dream world, I'm friends with Mary, she is nice, and I get to visit her regularly- she's like an Aunt)
My Aunt Bess made me a "Teddy Bear blanket" when I was a baby-- during my first years I did not use it, Mom stapled it to the wall above my bed...when I was tall enough I'd stand on my bed and lean my little head on it. The blanket came down, and was my FAVORITE- just the right size to wear as a shawl, or cover chilly legs, wrap a stuffed friend in it...cold on a car trip? no problem!
Well...the blanket wore out years ago...I meant to make a new one years ago, never could decide what to make it out of. I got this Mary Engelbreit fabric on clearance at Hobby Lobby, and the red was given to me by Sarah Helm. In place of batting, I used 2 layers of flannel.
(in my dream world, I'm friends with Mary, she is nice, and I get to visit her regularly- she's like an Aunt)
 “Friends are the family you choose.” -Jess C. Scott

Thursday, November 21, 2019
Crochet Fun~ round 5
Last Winter I was wearing a wool sweater and leaning on my elbow while working on puzzles....the result was a BIG whole in the sleeve. =( And tears. I set it aside to "fix later"....
 This Fall Mom mended the sweater, and then I covered the odd spot with a wool heart! =)

I used HappyBerryCrochet's YouTube lesson here: "How to Crochet a Heart"
I learned it is never a good idea to lean on one's elbow while wearing wool.
I submit to you the reason our Grandmothers always told us not to lean on our elbow was because of the potential damage to wool sweaters that folks used to wear all the time.
song: https://www.youtube.com/watch?v=GLHY0Pqeyzw&feature=youtu.be
Tuesday, September 24, 2019
Crochet Fun~ round 4

Another fun little project: Dad wanted his Boofle to have his very own hat (you can buy your own Boofle online- Amazon, etc)...I invented this little driving hat- and I included slits for his ears to stick through, so that the hat stays on while they play together. =)

Friday, September 20, 2019
little quilt project (for sale too)
I whipped up 2 little quilts-- they are 18 1/2" by 23 1/2" -- so a good size for dolls & teddies OR a car seat blanket! Do you know a little girl who would like one? =)
(All new materials, Cotton exterior. $10 local pickup or $15 shipped.)


(All new materials, Cotton exterior. $10 local pickup or $15 shipped.)


Thursday, September 05, 2019
Crochet Fun~ round 3
I made four more little birds, and all sold~ thanks friends!!! =)

I just love it when folks love what I make as much as I do:
 |
"Bella has been playing with it.
She is calling it both bluebird
and little Robin red breast."
|
 |
| "The little chickadees found their momma!" |
Saturday, August 17, 2019
Crochet Fun~ round 2
 This is the Baby Rattle I made for Kimberly, the nice pregnant lady who works at ALD!
I was trying to make a snake, but that was NOT working, so I invented a rattle. I started with a bird "Wing", moved on to the "Beak" for a while to complete the handle, then switched to the bear's "Muzzle" and when I thought that it was round & tall enough, I reversed the "Muzzle, stuffed it and closed it up! (with a bell inside!)
~~This was very fun to make~~
Can you tell I used techniques from Stacey Trock's Woodland Animals (DVD)???

"With integrity, you have nothing to fear, since you have nothing to hide.
With integrity, you will do the right thing, so you will have no guilt."
~Zig Ziglar
Tuesday, August 06, 2019
Crochet Fun~ round 1
First little bird I made with button eyes (regular Red Heart & a G hook), found a good home with Deya!


And then I "tweaked" the pattern so I could use the bit of leftover baby yarn I had, and used those snap in animal eyes. See- much smaller & rounder- maybe even more adorable:

Body: Stitched Rounds 1-10, skipped ahead and stitched rounds 15-21, skipped ahead again and stitched 27-34.
Wings: Stitched 1-6, skipped ahead and stitched round 9.
Attached Wings on row 11 and Beak on rows 8 & 9.
Wednesday, June 12, 2019
Sewing for a Llama
Can be tricky...
(Mom helped me make a little jacket pattern so I could make the Llama she bought for Hope a cute jacket! =) It was a fun little project!)

...but if it turns out, everyone will love it!
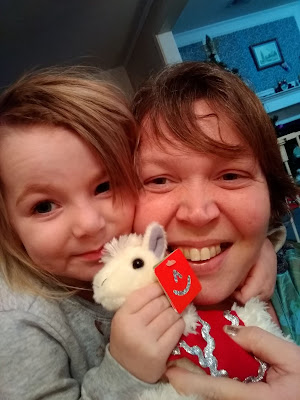
(Mom helped me make a little jacket pattern so I could make the Llama she bought for Hope a cute jacket! =) It was a fun little project!)

...but if it turns out, everyone will love it!

Mom got the Llama at the grocery store, but you can get one HERE!
Wednesday, April 24, 2019
Little Green Cabinet (part 3)
So sorry I'm SO late in sharing this project with you!!! =/
I'd been on the hunt for a few years for the perfect or nearly perfect cabinet for my room. I was thinking a little one to stack on my dresser or a actual large china cabinet or hutch- never found the right thing, and then one day, a customer of Dad's just GAVE this one to him for me!!! It needed paint, and the inside smelled*, but it was CUTE!

I
was nervous for a few weeks before starting this project (as it was the first of it's kind for me), and then just
charged in and did it! I mostly used a real paint brush, but some
places I used a (1"?) foam 'brush'. The green paint was leftover wall
paint I had: "Refresh" by Sherwin-Williams. Mom was NOT sure that I
should use the color, but she loves it now! (the white paint is SW trim
paint)
The top of the cabinet & most of the insides are the trim paint- makes a nice hard finish that things should NOT stick to. The front edge & undersides of the shelves are the green. Laying in bed, I get to see the underside: happy me, more green to see!
(I painted the "happy" & "love" I got at Hobby Lobby with "Refresh" also)
I'd been on the hunt for a few years for the perfect or nearly perfect cabinet for my room. I was thinking a little one to stack on my dresser or a actual large china cabinet or hutch- never found the right thing, and then one day, a customer of Dad's just GAVE this one to him for me!!! It needed paint, and the inside smelled*, but it was CUTE!

The top of the cabinet & most of the insides are the trim paint- makes a nice hard finish that things should NOT stick to. The front edge & undersides of the shelves are the green. Laying in bed, I get to see the underside: happy me, more green to see!
(I painted the "happy" & "love" I got at Hobby Lobby with "Refresh" also)

((part 1))
((part 2))
((this is part 3))
*it smells like our old church: Westminster Presbyterian Church in Abilene TX, LOL! (still smells, so I can't keep books & DVDs in it that I had intended in it)
Saturday, May 26, 2018
DIY: Mini Pinatas

(I got the free Fiesta banner over at "I Heart Nap Time". click here.)


I LOVE sewing crepe paper~ it is SO satisfying!

(see the party photos here)
Subscribe to:
Posts (Atom)